Pre-Production
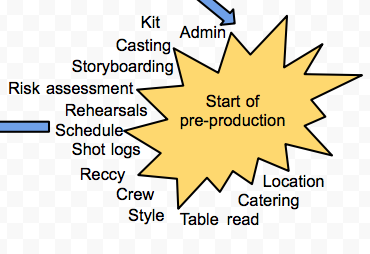 Before starting my pre-production work, I planned out everything that would need to be done in order for my film to go to plan, the mind map shows everything I had to think about planning.
I didn't want to make an extremely specific plan about the storyline for my film but after looking at the brief I decided I wanted the story to be based on a sibling rivalry. Also I decided that I didn't want the PI element to be extremely unrealistic and spy like, so my final idea was for two sisters who are no longer in contact to both be participating in the same election without each others knowledge. What one of the sisters is also unaware of is that their father is secretly rigging the election so that her distant sister who doesn't speak to the family will be the winner of the election. Therefore the father is the PI character in the film.
For my pre-production I created a treatment, wrote a script that I annotated and finally locked, did recces along with a scouting report, drew detailed storyboards, made a shot list and planned and justified the sounds I would be using in the film which included finding royalty free sounds for my film that would definitely be clear.
I feel as though I completed this pre-production work to a good standard that clearly created a pathway to my film production.
The bits that were more of a struggle and took the longest to finalise were my script writing and storyboarding. The script took me a long time to lock as I had to finalise my plot line in such a way that I would be able to film with ease, if I was to be overly imaginative there would have been no way I would've been able to access the locations or tools to film. However I finally locked my script and was happy with the final draft. As I had to alter my script quite a lot, this also meant I had to alter my storyboards, as well as having to alter the story on the storyboards I was also learning as I went along the style in which I wanted to draw my storyboards making sure they were clear but not overly time consuming. When my storyboards were complete they were easy to follow and also very helpful for me to visualise what I wanted the camera to capture.
Production

After practicing some basic shots around the college and putting them together, I created my filming schedule and made sure everyone in my group was available when I needed to be and everywhere I wanted to film would be accessible for us all. I got all of my footage filmed over two days and everything went to plan as I followed my script, shot list and storyboards. With help from the other members of my group we set up the shots in a way that I was happy with and also I altered some shots from how I originally planned them to look in a way that actually looked more effective when captured.
The only problem that occurred was that when I was filming my car park scene there was some loud, building noise in the background. I was able to overcome this though by deciding to use a Rode mic directed straight at the characters who would be speaking, as well as making sure the mic was as close to them as possible without getting it in shot. When I watched the footage back the building noise wasn't a problem which I am happy about as it would've slightly ruined the final outcome of my film.
Post-Production

My final film will be posted publicly on Youtube so anyone will be able to access and watch it. I will share the link to my film with my peers in order to get some feedback on how they feel my final product turned out, I will get this feedback through Youtube comments that I can look at so I know which areas I need to look at improving in the future.


